Friday, March 13, 2015

to make a table.

This past quarter I took a furniture fabrication class.  It was the perfect opportunity to learn the proper tools and techniques for wood working.  Our assignment was to make a shaker table.  We were given a 6 foot board of rough wood and a set of plans.
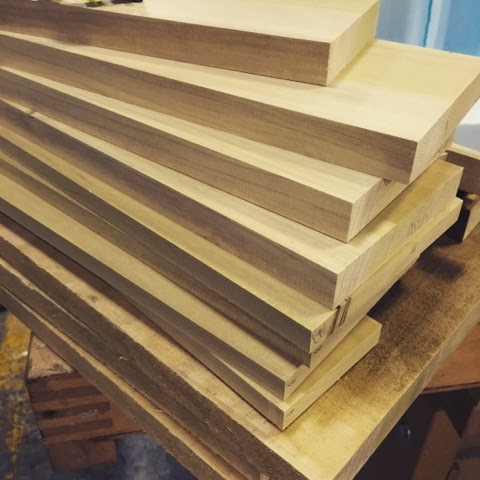
The first step was to rough cut the boards down into workable lengths, making sure to plan it out so all the elements were accounted for, and planing them into smooth parallel boards.

The legs were cut and mortises drilled in.  The aprons were then cut with tenons.


A dovetail was chiseled in.

The glue up occurred in multiple stages.  No nails were used in the making of this table.

The drawer was then assembled to fit perfectly in the table.
The fun part came with the choice of stain and finish.  I had made an ebonizer which is a solution of steel wool, vinegar and water that sat for a couple of weeks.  When applied to the wood, the solution reacts with the tannins creating a deeper hue.  This application can be unpredictable to many tests were done to test the color and over time the table in general will darken.  I was interested in keeping the natural wood grain visible and deepening the hue slightly.  I finished it with a satin polyurethane.
The drawer front was another place to add some unique touches.  I used the laser cutter to engrave a basket weave, I had to get some fibers in there!, then topped it off with great stone handle.
I am very pleased with the outcome of the table.  I ran into a few glitches with the fitting of the drawer but overall the table is square and stands straight.  The color is so rich and beautiful and it fits perfectly in my little apartment!  I'm looking forward to incorporating more furniture elements into my fibers work.  Now the possibilities are endless.

Be Inspired. Be Bold.

peace&love

Rebecca

Wednesday, March 4, 2015

Shapes in Space


I have been experimenting with how shapes and lines interact in space.  Bringing the woven structure off the loom and into an unconventional space, being woven and being displayed.  Branching from my wall weaves, where I wove directly onto the wall then removing and installing in another location, this “weave” was created on a mobile frame that was installed in a location.  The frames incase simple lines that when hung and suspended from the wall interact with each other creating new lines and patterns.  A moire effect is achieved creating unwoven woven patterns.  The simplicity is a departure from my other textural work but it's a nice contrast.


Be Inspired. Be Bold.

peace&love
Rebecca

Sunday, March 1, 2015

Shag meets Structure

As I develop my wall weave process, I have branched out into knotting shag directly onto the wall.  This process incorporates many techniques that when together create a dynamic piece with lots of interest.  I love going big and for this project I did not hold back.
Strips of reclaimed fabrics, all hand dyed to the perfect shade.  Some solids and some shibori.
Start of the shag.  A system of warp threads are strung vertically as a base for the knotting.  Then I just went to work, building up layers of textures and colors.


The wood for the frame.  I ripped the wood into 1" thick pieces and cut the angles to create unique triangles.
Painted a matte black.

The triangles being assembled.
Experimenting with a new plane in which to weave.  By stretching the string in the frame, a floating weave is created, bringing woven elements out into space.

The assembly and installation.
The final piece.  I love how this turned out.  This piece combined all of my loves, shag, weaving, knotting and woodworking.  This structure has many possibilities and I have much more to learn about how it works and interacts in the interior.  The possibilities of textured walls are endless.


Be Inspired. Be Bold.

peace&love
Rebecca

A Retro and Reclaimed Installation

The VHS tape, a simple material, with endless possibilities.  The challenge was to not overwork the material and to use its characteristics as a strength.  This was a collaborative installation project with the Fibers Force! Club at SCAD and our alumni mentor Trish Anderson for the Fibers Department Open Studio.  We came up with two designs, both different but relating to each other seamlessly.
Both designs required very minimal supplies, really focusing on the VHS tape as the main material.  For the first design we wove the tape to the wall, playing with levels, planes and angles.  We had to create a system of nails on wood that the tape would weave onto.  All the materials were 100% reclaimed and recycled, being rescued from the dumpster and the woodshop.


For the second design we draped the tape into the stairwell.  A convex tunnel was created that flowed up the stairwell.  As you reached the landing the lines straightened out.  This simple design was very dynamic, as you would move through and around the piece the lines would change.  Every view point offered different and exciting viewing experiences.


This was a great experience to work with such a great group of creative minds.  This was my first time installing such a large piece.  The ideation, research and refining the idea took much longer than expected.  The evolution of the idea went through many phases, ending with a simple and clean design.

Be Inspired. Be Bold.

peace&love
Rebecca

Wednesday, February 25, 2015

Retro and reclaimed.

Fun items reclaimed and rescued from the recycling center.  Oh the possibilities.


Be Inspired. Be Bold.

peace&love

Rebecca