Wednesday, August 28, 2013

Coozie Time

Even though summer may be coming to an end, it's always coozie time.  Coozies are great all year round for every occasion.  The come in all shapes and sizes.  I've engineered these coozies to fit standard cans, bottles, and the cute little coronita.

It's always important to keep your beverage cold.


Choose from one of my many fabrics and prints or get a custom coozie printed!


And don't forget the CoozieKeeper.

If you like what you see please check out the ZerbyShop on Etsy 
or if you would like to commission a custom coozie contact me at rebeccazerby@gmail.com 

peace&love
Rebecca


Monday, August 26, 2013

Yellow Inspirations from the Garden


I seem to have a thing for yellow, 
but with all these wooly Sunflowers and Black Eyed Susans, 
how could you not?!

Why not add some accents of yellow into the interior this fall!
Be Bold.

peace&love
Rebecca


Friday, August 23, 2013

The Process of Screen Making

I started the print shop last summer by making 6 screens from scratch.  In the past couple months orders for various projects and shirts have been flowing in and the need for more screens is now necessary.  I thought it would be fun to show you the step by step in the production of a silk screen.  I now have a total of 8 screens and can't wait to start printing!

 cut the wood.
 organize the wood.
 build into frames.
two coats varnish.
stretch the screen.

 tape the edges.
start printing! 

be bold in your designs

peace&love
Rebecca


Tuesday, August 20, 2013

Cabinet Transformations.. Discovery of a Great Product

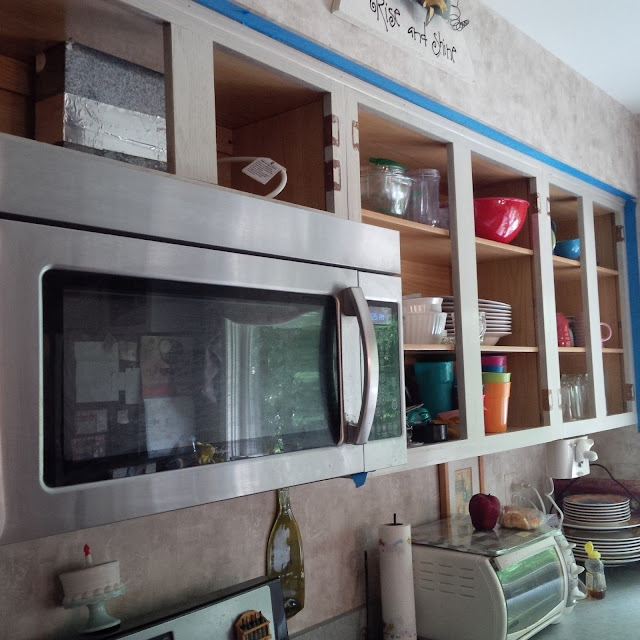
I just discovered a great product for refinishing cabinets, furniture, and anything else wood based.  The product is Rust-Oleum Cabinet Transformations.  It's a four step process that yields great results.  I can't believe I'm just discovering this now!  Check out the step by step transformation.

The cabinets before.  We took off all the doors to make for an easier assembly line application through the steps.  When refinishing it's common to sand down the surface first, but in this process there is a degreaser solution that is scrubbed on, then wiped off.  It took a little elbow grease in some areas.
 Tape off the remaining woodwork and repeat the same process.

 The second step is to apply the primer base.  This is a tinted base and will change depending on the overall color you selected.  This product comes in 35 different shades ranging from light woods to dark woods.  This primer base is great because it will cover up any previous color, paint, wood grain, or finish.


 The third step is optional, a decorative glaze.  The glaze really gave the wood some nice dimension and turned it from a flat brown color to a rich wood effect.

The final result was a rich, velvety, chocolate color.  A very nice satin finish that is much nicer than any other process I have done before.
The final step is a top coat that seals in all the hard work we just put in.  All thats left is to reattach that the doors and fixtures.  Voila!  A new kitchen in about 3 days time!

Seems simple enough but if you want someone to do all the dirty work, feel free to contact me!  
Email me at rebeccazerby@gmail.com for a consultation.

Be Bold in your design decisions.

peace&love
Rebecca


Monday, August 19, 2013

the transformation of a bedroom

The Before


Midway


 The After


a beautiful green.  the right shade for the right room.

peace&love 
Rebecca


Friday, August 16, 2013

Thursday, August 15, 2013

Saturday, August 10, 2013

Adventures through Wisconsin.. part II

 Hotel on the Riverfront
Bike ride from Onalaska to Trempealeau
Crossing the Black River

 Beverage on the deck of the Trempealeau Hotel.
Looking out on the Mississippi River.
 A small field of wildflowers.
 Boat ride on the ole Mississippi.

happy travels

peace&love
Rebecca