Showing posts with label warp yarn. Show all posts

Tuesday, November 26, 2013

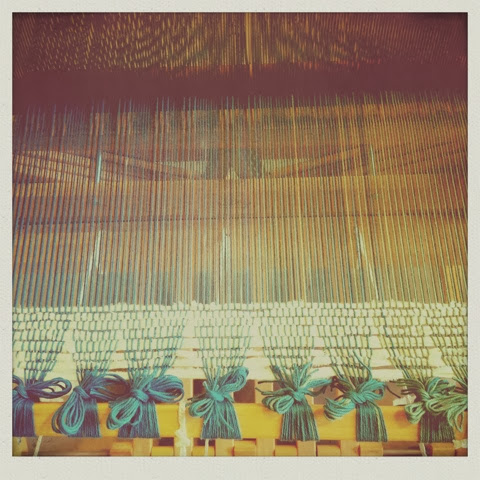
The Rug.. Threading the Heddles

Everything takes longer on a bigger loom...especially threading the heddles.


Now to wind it up and I'm finally ready to start weaving. 

peace&love
Rebecca 

Thursday, November 21, 2013

The Rug.. Made it to the Big Loom

With all the preparations done, I headed to the loom.  The loom is 42" long and my rug will fill up 38".  The rug will be warped faced, meaning only the warp threads show, so I doubled up and tripled up the threads per dent.  My rug is 15 epi (ends per inch) and there are 6 dents per inch in the reed.  So I threaded 3, 2, 3, 2, 3, 2.  


The next step is to thread the heddles, but you and I will have to wait until Monday for that.

Be Bold in your Designs.

peace&love
Rebecca

Tuesday, November 19, 2013

The Rug.. A Touch of Blue

With the final color added, the yarns are ready for the loom.


So close.. It's the start of the end.  All the measurements, calculation and preparations have paid off.  I will pick up speed on Wednesday and in no time the rug will be complete.

peace&love
Rebecca


Monday, November 18, 2013

The Rug.. Chevron Dyeing

Yesterday I dyed the warp yarns.  All my preparations paid off and everything went very smoothly, but since I had about 5 dye lots, it still took a good 6 hours.  Here is the process.

I started off with 3 dyes.. taupe, old ivory and dark gray.  When I ordered these dyes they did not have color samples so I just hoped for the best.
The recipe called for white vinegar to act as a mordant, what attaches the dye to the yarn.
For the dye to work best, the dye needed to be simmering.  I used this large aluminum, old camping pot (worked great).
After choosing and tying off each section that needed to be dyed, I dipped each end in the simmering dye.  
It only stayed in for a couple of minutes.  I could see the yarns soaking up the dye.
The first batch.  The last yarns added to the dye bath ended up lighter since the earlier yarns had soaked up all the dye.
The first dye lot.. taupe, all laid out.. everything is going to plan.
Re tying for the the next color.
The second color is a less concentrated taupe.
Re tying for the third color.
Third color, Old Ivory.. all laid out.
I had one more color, a dark grey, that tied everything together.  Stay tuned for the start of the weaving process.

Be Bold in your Designs.

peace&love
Rebecca

Sunday, November 17, 2013

The Rug.. Pre Dye Preparations

Organization and preparation is key in weaving.  It took a lot of planning ahead of time so that when I start dyeing, everything will go smoothly.  Here is how I prepare myself for the dyeing process.
Measure and tie off all the yarns.
Stretch out all the yarns.
Each bundle represents an inch (15 epi).  This will be a warp faced rug.
Now I can tie off the pattern to prepare myself for dyeing.  I have color coded the sections so I know which dye goes where.  I will be making a chevron pattern that will be done in an ikat manner. (Ikat will be further discussed later on in the weaving process.)
I numbered each grouping of yarns so after dyeing I can put them back in the appropriate order and it will be all ready for the loom.
Now I'm ready for dyeing!

peace&love
Rebecca

Monday, November 11, 2013

Weaving.. The Rug

And it begins again..


For my next project I am going bigger.  I will be creating an ikat wool rug.  I will be hand dying the wool yarns by hand in an ikat pattern.  To start off I've calculated all the warp yarns I need and now to measure and cut.  Stay tuned for the dyeing of the warp and then the fun part.. weaving. 

Be bold in your Designs.

peace&love
Rebecca

Thursday, October 17, 2013

The Weave.. day one

So who would of thought it would take so ling to dye the yarn?  After a week or so of dying and two weeks of untangling and re measuring the warp yarn, it is finally ready to start weaving!  Here's the start of the weaving process.  


The weaving had begun.  I chose a much more intricate pattern.  I can't wait to see how it turns out.

Be Bold in your designs.

peace&love
Rebecca


Tuesday, October 15, 2013

Dyeing of the Warp.. OMBRE

For this next project I am attempting an ombre fade through the warp threads.  You saw the dying process in previous posts and here it is all measured out.  With the ombre fade on the warp threads (versus the weft threads) the fade will be atmospheric, fading from the horizon.  
I blended the yarns to get an even yet random gradation of color.
On the loom.
Threading through the dents of the reeds.


Be Bold in your designs.

peace&love
Rebecca

Thursday, October 3, 2013

Live to Dye.. Part Two


For this porject I am creating a gradation ombré effect that will go from dark navy to a lighter turquoise.  I took my four bundles of warp yarns and planned out the perfect mix of color for each bundle.  

First fill all four buckets with warm water, about 2/3 full, or enough to cover the yarn or fabric your about to dye.
Soak the bundles of yarn in the water.
Mix the dyes.  3 teaspoons of dye powder with enough water to dissolve the powder.  I used a combination of three colors: navy, teal blue and canary yellow.
Lift the yarn bundles, pour in the dye, and submerge the yarns.  Let sit for 5-10 minutes, stirring occasionally.
Mix a salt solution.  2/3 cup salt to 1 cup of water. Stir to dissolve.  Pour into the bucket, stir and let sit for 5-10 minutes, stirring occasionally.
Mix the soda solution.  3 tablespoons soda to 1 cup water.  Mix into the bucket and let sit for 10-20 minutes.
Rinse out the yarns until the water runs clean.
Let dry and enjoy the beautiful colors.


Be Bold.

peace&love
Rebecca