Thursday, October 31, 2013

Placemat Production.. the Hem

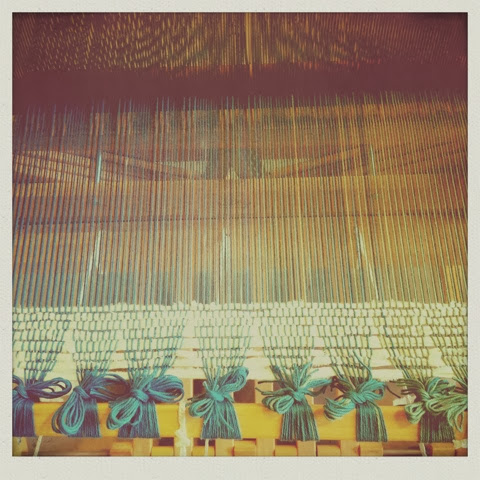
When weaving placemats, all the placemats are woven on the same warp threads.  So no need to set up the loom for each mat.  To separate the mats, when you have reached the appropriate length, do a couple of tabby weaves then hem the edge.  It's easier to hem when the mats are still on the loom because of the tension.
Then weave in some spacers, the same thin strips of fabric I used when first starting weaving.  This spaces out each mat.  This would also act as the tassels when removed from the loom.  My placemat will not have tassels so the spacing is small.  I then start the next mat, hemming the first edge after a few rows are completed.
A look through to see the completed mat beneath.
The production line.. very productive.  
Once I get in the groove, my tempo picks up and the mats roll out.  My goal is to maximize my efficiency.

Be Bold in your Designs

peace&love
Rebecca


Tuesday, October 29, 2013

Cochineal.. Experimenting with Natural Dyes

After a research project I completed on the Oaxacan Rug weaving, I became very interested in the use and process of natural dyes.  It amazes me that prehistoric people were using these techniques and materials that laid the groundwork for the current dying processes.  With something so natural, why use synthetic?
First I unwound my balls of yarn, wool on the left and cotton on the right, and rewound them so to get a more even dye.
Alum is the metal binder that is used to help adhere the natural dye to the yarn fiber.  The yarns can be soaked in this first or it can be added to the dye pot and done all at once.  I added mine to the dye pot.
This is a batch of the cochineal dye.  Cochineal is an insect found on prickly pear cacti.  They are picked/harvested from the cacti and dried.  We placed a handful of the little insects in a cheese cloth to keep them from floating all around.  The dye is slowly brought up to a boil and is kept at a long simmer to get a nice color, then cooled down.
Then we added the yarn.  We slowly brought it up to a simmer and kept it at the simmer for about an hour.  Since we didn't quite have enough dye we had to stir it constantly to make sure it got an even soak.  After the hour we turned off the heat and now we are letting it sit.  All will be uncovered Wednesday!

try something natural.

peace&love
Rebecca


Thursday, October 24, 2013

A Finished Floor Plan


For my rendering class I created a floor plan for a house located in the Arizona desert.  Since it was a floor plan I wanted to focus on putting different textures onto the floor.  I was really excited to experiment with terra cotta tiles.  It was fun using a handful of markers and blending them together to create the various hues of the tiles.  I kept the color scheme in neutral tones and contrasted it with the white walls and pops of blues.  For the exterior I brightened up the desert landscape with bright pops of tropical plants and deep blue planters.  And no desert house is complete without a blue tiled pool to cool off in those hot summer days.


Be Bold in your Designs.

peace&love
Rebecca

Wednesday, October 23, 2013

Throwback to Macrame

For my next fiber exploration I looked to the past for unique weaving techniques.  Macrame is something I have always found simple and beautiful.  After doing my Pinterest research and looking up different macrame designs I was ready to do some experimentation of my own.  After making a few knots I realized this is the same technique that I used to make my bracelets down at the beach.  It all made sense now.  Now I was ready to to go for it.  
I measured out all my yarns.  I used twisted cotton twine from Lowes.  It took some figuring out measuring and untangling but once it was cut and tied up I was ready to go.  
I stared with some simple knots a the top.  I wanted to keep it a simple design so not to get too confused throughout the whole process.  I had nailed it up to the wall in my hallway to make it easier to tie up.
To finish it off I set it against a burlap fabric.  It gave a nice neutral contrast and added to the whole 70s vibe.
The final product was for a portable tiki bar that my dad had just finished making.  It needed a cover for the front and this finished it off nicely.  This was the first collaboration between me and my dad and the project was a huge success.

Be Bold in your Designs.

peace&love
Rebecca


Tuesday, October 22, 2013

Farm to Table.. Butler's Farms Harvest Dinner

This weekend my mom and I took a quick semi-spontaneous trip up to Wisconsin.  We were literally in the state of Wisconsin for 12 hours.  All the travel for the little amount of time there was worth it because we attended the Butler's Farm Dinner at the Harvest Restaurant in Madison.  Every year the Butler's Farm has a feature dinner at the Harvest Restaurant, highlighting all their delicious hand crafted sheep milk cheese and organic free range meat products straight from the farm.  This years dinner was so special that I just had to share these unique, innovative, and delicious courses. 
There were six courses and each was paired with the perfect wine from Robert Sinskey Vineyards from NapaValley, California.
 Butler's Cheese
Templemore, Tomme, Brebis
Rack & Riddle, Brut, North Coast, California NV
 Butler's Mascarpone
Savory Cheescake, Beet Chips, Cranberry Couli
Sinskey Abraxas, Nappa Valley, California 2012
 Butler's Pork & Feta Trio
Pork Head Cheese, Pumpkin-Jalapeno Jam 
Pickled Pork, Macerated Cranberries, Apple Crisp
Medjool Dates, Feta, House Smoked Bacon
Sinskey, Pinot Noir, Los Caneros, Napa Valley, California 2010 
 Butler's Pork & Clonboo
Pork Schnitzel, Cider Beurre Blanc
Clonboo Rosti, Pickled Hyslop Crab Apples
Sinskey, Pinot Noir "Aires", Napa Valley, California 2010
 Butler's Lamb & Ricotta
Lamb Ragu, Ricotta Gnocchi,
Wisconsin WIld Harvested Hen of the Woods Mushrooms
Sinskey, POV, Napa Valley, California 2010
Butler's Camebert
Poached Seckel Pear & Camembert Tart, Candied Wisconsin Hickory Nuts
Sinskey, Pinot Blanc, Napa Valley, California 2012

The pictures don't do these courses justice but hopefully you got the essence of the creativity and unique spin on traditional dishes.  If your ever in Madison, check out the Harvest Restaurant for a delicious farm to table dinner experience.

peace&love
Rebecca

Thursday, October 17, 2013

The Weave.. day one

So who would of thought it would take so ling to dye the yarn?  After a week or so of dying and two weeks of untangling and re measuring the warp yarn, it is finally ready to start weaving!  Here's the start of the weaving process.  


The weaving had begun.  I chose a much more intricate pattern.  I can't wait to see how it turns out.

Be Bold in your designs.

peace&love
Rebecca


Tuesday, October 15, 2013

Dyeing of the Warp.. OMBRE

For this next project I am attempting an ombre fade through the warp threads.  You saw the dying process in previous posts and here it is all measured out.  With the ombre fade on the warp threads (versus the weft threads) the fade will be atmospheric, fading from the horizon.  
I blended the yarns to get an even yet random gradation of color.
On the loom.
Threading through the dents of the reeds.


Be Bold in your designs.

peace&love
Rebecca

Wednesday, October 9, 2013

To Render A Floor..

..use lots of markers.  The key is in the layers.  Im trying my new techniques on different types of floors.  Terra cotta, herringbone wood panels, cement pavers.

 terra cotta tiles
 light wood panels in a herringbone
cement pavers

Stay tunes for the rest of the rendering of this floor plan.

peace&love
Rebecca

Tuesday, October 8, 2013

A Bold Transformation

This library went through a great transformation.  From formal, red and wallpapered to fresh, clean and a bold pop of color.  I was excited to work with a fellow design student on this project.  She had a great vision and wasn't afraid of color, and it payed off.  Check out this bold transformation.  I hope this inspires you to go crazy with colors!  

Removal of the wallpaper.
Patch up the walls and paint the trim.
Edge out the green for the bookshelves. 
Fill in bookshelves and edge out the muslin for the walls.
Fill in the walls.
Voila.  A beautiful emerald and muslin colored library.
A great pop of color.
It pays off to make bold design decisions.  Don't be afraid of color.  
Well balanced use of color in the perfect shade makes for a beautiful unique room.

Be Bold.

peace&love
Rebecca

Thursday, October 3, 2013

Live to Dye.. Part Two


For this porject I am creating a gradation ombré effect that will go from dark navy to a lighter turquoise.  I took my four bundles of warp yarns and planned out the perfect mix of color for each bundle.  

First fill all four buckets with warm water, about 2/3 full, or enough to cover the yarn or fabric your about to dye.
Soak the bundles of yarn in the water.
Mix the dyes.  3 teaspoons of dye powder with enough water to dissolve the powder.  I used a combination of three colors: navy, teal blue and canary yellow.
Lift the yarn bundles, pour in the dye, and submerge the yarns.  Let sit for 5-10 minutes, stirring occasionally.
Mix a salt solution.  2/3 cup salt to 1 cup of water. Stir to dissolve.  Pour into the bucket, stir and let sit for 5-10 minutes, stirring occasionally.
Mix the soda solution.  3 tablespoons soda to 1 cup water.  Mix into the bucket and let sit for 10-20 minutes.
Rinse out the yarns until the water runs clean.
Let dry and enjoy the beautiful colors.


Be Bold.

peace&love
Rebecca